


Last updated: October 2026 Written by the LiftKitGuide Team, truck suspension installers and editors
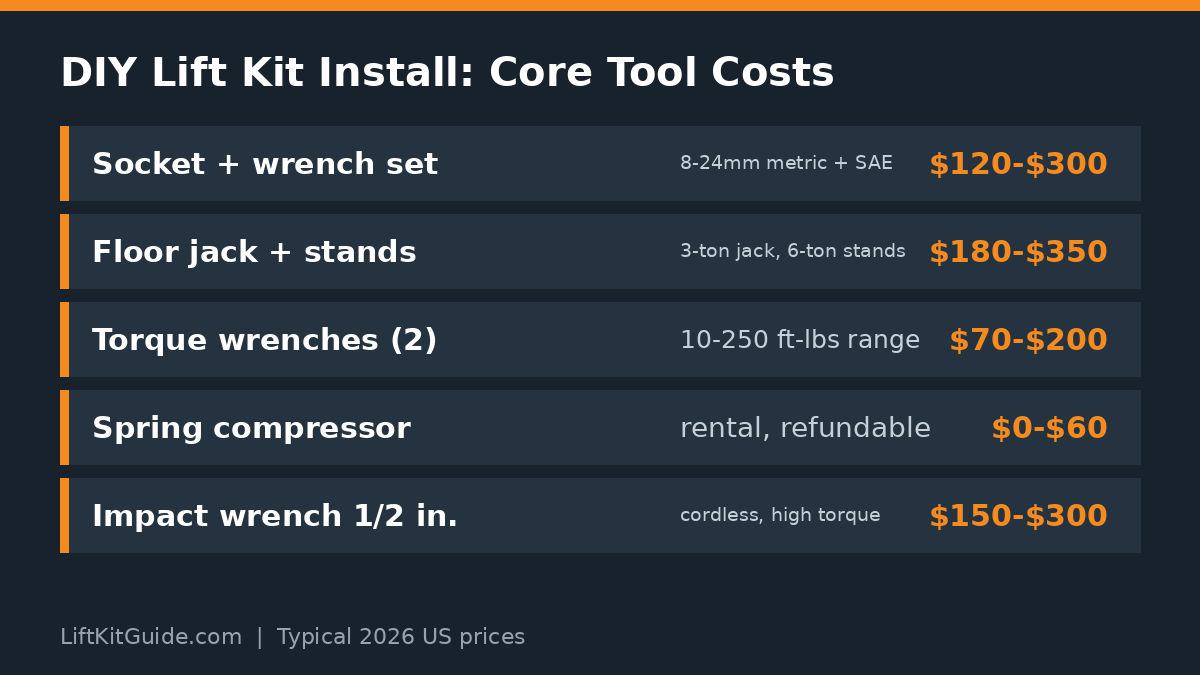
If you are asking what tools do you need to install a lift kit yourself, the short answer is a full metric and SAE socket and wrench set, a 3-ton floor jack, tall 6-ton jack stands, a torque wrench rated to at least 250 ft-lbs, a spring compressor, and hand tools like pry bars and a breaker bar. Most 2- to 3-inch kits install in a driveway with $400 to $900 in tools, and the spring compressor rents free with a refundable deposit.
Key takeaways
- Budget $400 to $900 for a complete DIY tool setup if you own nothing; a spring compressor rental is free with a refundable deposit.
- Use tall 6-ton jack stands — shorter 2- and 3-ton stands often cannot reach a lifted truck’s frame safely.
- You need two torque wrench ranges: a low range (10–80 ft-lbs) for small hardware and a high range (25–250 ft-lbs) for lug nuts and suspension bolts.
- Metric sockets from 8mm to 24mm cover most truck suspension bolts; add SAE sizes for older domestic trucks.
- Soak every rusty bolt with penetrating oil 24 hours before the job — it is the cheapest time-saver on the list.
On this page
What tools do you need to install a lift kit yourself for a basic 3-inch kit?
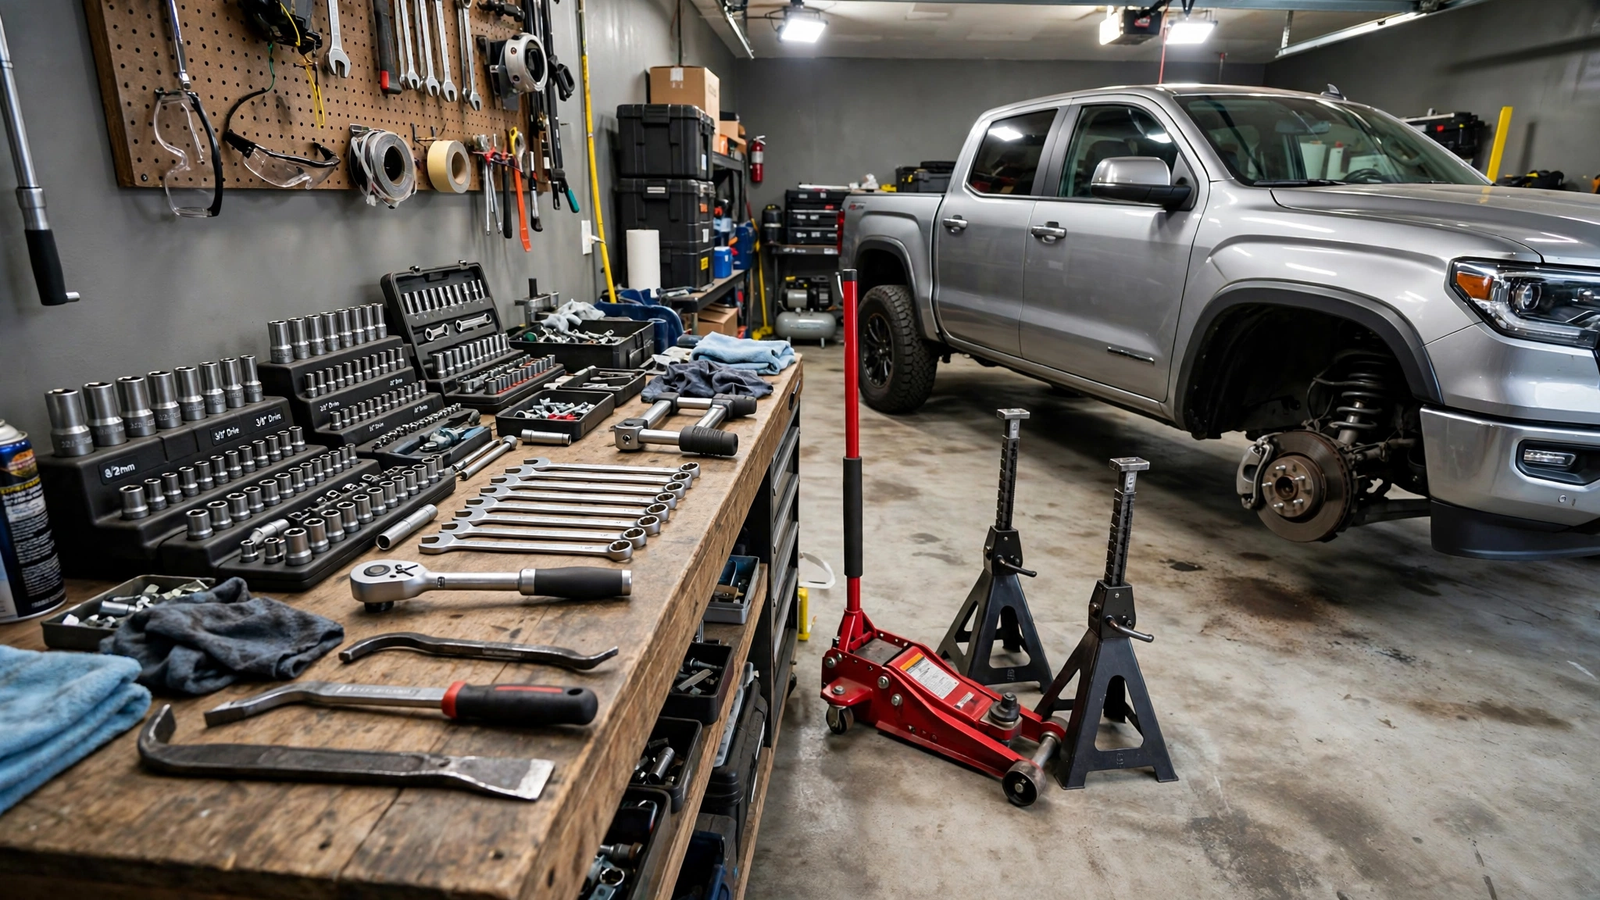
When owners ask what tools do you need to install a lift kit yourself, they are usually picturing a basic 2- to 3-inch suspension kit — coil spacers or struts up front and blocks or an add-a-leaf out back. For that job, the core list is shorter than most people expect: a complete metric socket set (8mm through 24mm), combination wrenches in the same range, a 1/2-inch drive ratchet with short and long extensions, a breaker bar, and a set of pry bars. Deep-well sockets matter because suspension studs are long, and a swivel socket saves real frustration on upper strut mount nuts. If you are still asking what tools do you need to install a lift kit yourself, start here: sockets, wrenches, and a breaker bar cover most fasteners.
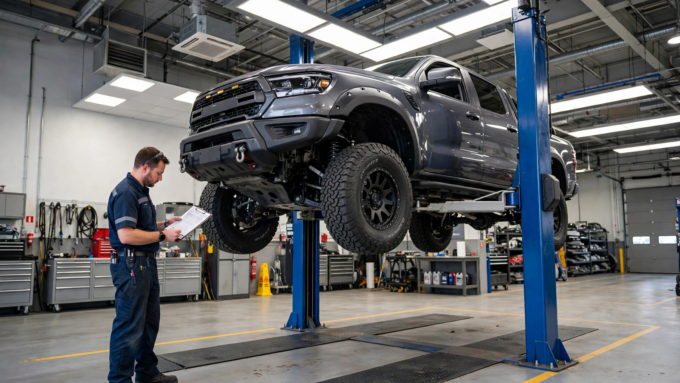
The second half of the answer to what tools do you need to install a lift kit yourself is the lifting and holding gear. A 3-ton floor jack with enough lift height is the minimum — a small jack may be technically strong enough but will not reach a truck’s frame with the suspension drooped. Four jack stands are better than two because you can support the whole truck at once, and tall 6-ton stands are the forum favorite since shorter stands leave a lifted truck’s frame out of reach. Never work under a truck supported only by a jack. What tools do you need to install a lift kit yourself for the lifting stage? A 3-ton jack and tall 6-ton stands — never trust a jack alone.
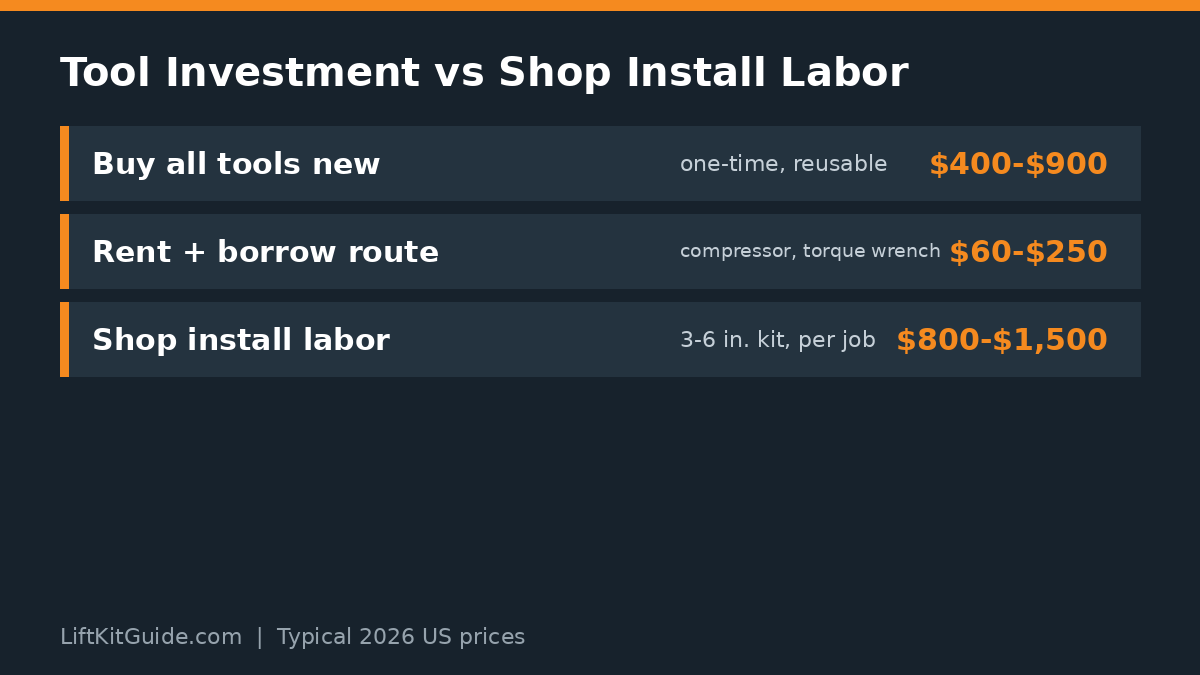
Beyond sockets and stands, plan on a 1/2-inch impact wrench (a 1/4-inch driver is not strong enough for suspension hardware), a torque wrench, and a coil spring compressor if your kit touches the struts. A full breakdown of shop pricing helps you decide whether buying tools beats paying labor — our lift kit installation cost guide compares DIY tool spending against typical shop quotes of $800 to $1,500. For more real-world tool setups from owners who have done this job, see the TacomaWorld tool list thread.
Which socket and wrench sizes matter most on truck suspension?
Metric sizes dominate modern truck suspension work. Plan on 8, 10, 12, 13, 14, 15, 17, 18, 19, 21, 22, and 24mm sockets, with deep wells for strut studs and axle nuts. Combination wrenches in the same sizes back up the sockets wherever a ratchet cannot swing — upper control arm bolts and sway bar end links are classic wrench-only spots. If you drive an older domestic truck, keep SAE sizes (especially 9/16-inch) handy because those trucks mix metric and standard hardware.
A socket swivel (universal joint) and a set of extensions deserve special mention. Upper strut mount nuts sit at awkward angles, and the swivel lets you reach them without rounding the nut. Vice grips and a set of pliers handle cotter pins and brake line clips, while a trim pry tool protects plastic clips and sensor wiring when you drop the front suspension. Cheap sockets round off rusty bolts, so this is one category where mid-grade tools pay for themselves on the first job.
One more size-related tip: a 1/2-inch drive setup is the working standard for suspension fasteners, with 3/8-inch drive reserved for smaller hardware like skid plates and splash shields. If you are comparing kit types before you buy, our suspension lift kits guide explains which components each kit height adds — and every added component is another fastener you will torque. Bottom line on what tools do you need to install a lift kit yourself for fasteners: 1/2-inch drive for suspension, 3/8-inch for small hardware.
| Tool category | Key sizes | Typical cost (2026) |
|---|---|---|
| Metric socket set (1/2 in. drive) | 8–24mm, deep + shallow | $120–$300 |
| Combination wrench set | 8–24mm metric | $60–$140 |
| Torque wrench (high range) | 25–250 ft-lbs | $40–$120 |
| Torque wrench (low range) | 10–80 ft-lbs | $30–$80 |
| Breaker bar + pry bar set | 1/2 in. drive | $40–$90 |
| Ball joint separator / pickle fork | — | $15–$40 |
What jack and jack stands are safe for a lifted truck install?
The jack and stands are the safety foundation of the whole job. A 3-ton floor jack is the practical minimum for a half-ton truck, and a long-reach or high-lift model is worth the extra money because stock-height jacks run out of travel with the suspension drooped. Lift from the frame or the axle — never from suspension arms or the oil pan — and always lower the truck onto stands before any part of you goes underneath. Asking what tools do you need to install a lift kit yourself for the lifting stage? Jack, stands, chocks — in that order.
For stands, the critical spec is not just the weight rating but the lifted height. Many owners learn the hard way that 2- and 3-ton stands are strong enough yet too short once the truck sits higher. Tall 6-ton jack stands solve both problems: the rating gives you a comfortable margin on a 5,000- to 6,000-pound truck, and the height reaches the frame with room to spare. Place stands under the frame rails, chock the wheels that stay on the ground, and shake the truck hard before you start wrenching — if it moves, reset the stands.
Budget roughly $180 to $350 for a 3-ton jack and a pair of 6-ton stands in 2026, or about $250 to $450 for four stands and a better jack. That sounds like a lot until you compare it with a single shop visit. If you are still deciding between doing it yourself and hiring out, our cost to lift a truck breakdown shows where the money goes in both paths.
Do you need a torque wrench to install a lift kit?
Yes — a torque wrench is non-negotiable for a lift kit install, and it is the single most skipped tool in driveway jobs. Suspension fasteners carry the loads that keep your wheels attached, and both under-torquing and over-torquing cause real failures: loose control arm bolts wallow out their holes and throw off alignment, while over-torqued ball joint studs can stretch or snap. Shops torque every suspension bolt for a reason, and your driveway job deserves the same standard.
You actually want two torque wrench ranges. A 1/2-inch drive wrench covering roughly 25 to 250 ft-lbs handles lug nuts (typically 140 to 150 ft-lbs on half-tons), control arm bolts, and track bar hardware. A smaller 3/8-inch drive wrench covering 10 to 80 ft-lbs handles strut mount nuts, brake caliper bolts, and other small hardware where the big wrench is inaccurate. Click-type wrenches in the $40 to $120 range are accurate enough for this work — just store them unwound at their lowest setting so the spring stays calibrated.
The exact numbers matter: lug nuts typically need 140 to 150 ft-lbs, and the torque ranges above cover what matters most — including why you should never use an impact wrench for final torque.
What specialty tools does a 3-inch lift kit install require?
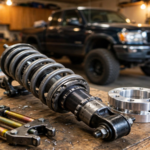
Beyond the basics, a 3-inch kit usually demands a coil spring compressor. Any kit that adds a spacer inside the strut or replaces the coil spring requires compressing the spring to disassemble the strut — and a compressed coil spring stores enough energy to cause serious injury if the tool slips. The good news is that most auto parts stores rent a quality strut compressor for a refundable deposit of about $60, so you pay nothing if you return it. Never use cheap no-name compressors or improvised methods on a truck spring.
A ball joint separator (pickle fork) or a dedicated ball joint press helps free the upper ball joint and tie rod ends without destroying the boots. A pitman arm puller matters on some solid-axle trucks, and a set of jack-stand-height wood blocks or a second jack lets you raise and lower the axle independently while you line up bolt holes. These specialty items are exactly what separates a smooth Saturday install from a weekend of frustration. So what tools do you need to install a lift kit yourself in the specialty category? Compressor, separator, and a second jack.
Before you buy anything, check what your kit actually requires — some modern kits are designed around the factory strut and skip the compressor entirely. And if the whole project starts feeling bigger than your toolbox, our leveling kit cost guide shows how a simpler 2-inch level compares, since many leveling spacers mount on top of the strut with no disassembly at all.
| Specialty tool | When you need it | Buy vs rent |
|---|---|---|
| Strut spring compressor | Any strut disassembly | Rent — ~$60 refundable deposit |
| Ball joint separator | Separating tapered joints | Buy — $15–$40 |
| Pitman arm puller | Solid-axle steering work | Rent or buy — $20–$50 |
| Second floor jack | Raising/lowering the axle solo | Buy if you do your own work — $100–$200 |
| Impact wrench (1/2 in.) | Breaking loose rusted hardware | Buy — $150–$300 |
Which power tools actually speed up a lift kit install?
A 1/2-inch drive impact wrench is the power tool that earns its keep. Suspension bolts are large, often rusted, and torqued to triple digits — a good cordless impact breaks them loose in seconds where a breaker bar takes minutes and a lot of sweat. Just remember the golden rule: impacts are for removal and rough assembly only. Final torque always goes through the torque wrench, because an impact cannot measure clamping force and will happily snap a stud. What tools do you need to install a lift kit yourself to go faster? A 1/2-inch impact wrench — for removal only.
An angle grinder with cutting and grinding discs is the second most useful power tool, mainly for one job: cutting off rusted or seized bolts that will not budge. Exhaust hangers, old U-bolts, and shock bolts are frequent candidates. A cordless drill with quality bits handles the occasional new hole for brackets or wire routing. None of these are strictly required — every lift kit ever sold has been installed with hand tools — but they turn a two-day fight into a one-day job on a rusty truck.
Air tools are nice but unnecessary for a home install; modern cordless tools match them for this work. Spend the air-compressor money on better jack stands instead. And keep a fire extinguisher within reach when grinding near the fuel tank or brake lines — sparks and a 20-year-old truck are a bad combination.
What consumables and supplies should you have on hand?
Consumables are the unglamorous items that make or break a driveway install. Penetrating oil (PB Blaster or equivalent) applied to every bolt 24 hours before the job is the single best time investment you can make — rusted suspension hardware is the number one reason DIY installs run long. Anti-seize on reassembly keeps the next job easy, and medium-strength thread locker (blue) belongs on fasteners the manufacturer specifies, such as some track bar and steering bolts.
Brake cleaner, shop towels, and a tube of quality grease round out the kit. Grease goes on polyurethane bushings and sway bar bushings during assembly to prevent squeaks. Zip ties and electrical tape secure ABS wires and brake lines you disconnect for droop clearance. A paint marker lets you mark bolt positions and alignment cams before disassembly so reassembly starts from a known-good baseline.
One more supply people forget: replacement hardware. Buy a few extra flange nuts and bolts in the common suspension sizes before you start, because a rounded or cross-threaded nut at 4 p.m. on a Sunday can stall the whole job. A quick check of our leveling kit explainer also helps you confirm you bought the right kit type before the truck is in pieces.
- Penetrating oil: soak all suspension bolts 24 hours ahead; reapply twice on rusty trucks.
- Anti-seize: coat threads on reassembly so the next service comes apart easily.
- Blue thread locker: use where the kit instructions specify — never on lug nuts or torque-to-yield bolts.
- Brake cleaner + shop towels: clean hub faces and threads before torquing for accurate clamp load.
- Grease: lubricate polyurethane and sway bar bushings during assembly to stop squeaks.
- Paint marker: mark alignment cams and bolt positions before disassembly.
What tools do you need to install a lift kit yourself on a tight budget?
If the budget is tight, the smart version of what tools do you need to install a lift kit yourself focuses on renting and borrowing instead of buying. Rent the spring compressor for free with a deposit, borrow a torque wrench from a friend or a parts store loaner program, and buy only what you will reuse: a decent metric socket set, a breaker bar, and jack stands. Many owners complete their first lift with under $250 in purchased tools plus rentals.
Buy used where it is safe to do so. Jack stands, hand tools, and breaker bars are fine secondhand — inspect welds and teeth before trusting them. Never buy a used torque wrench without having it calibrated, and never trust a used spring compressor of unknown history with a truck coil spring. Those two tools are where your safety margin lives, so they deserve new or verified-good condition. In the end, what tools do you need to install a lift kit yourself comes down to safety gear plus basics, bought once and used for years.
The final budget lever is choosing a kit that needs fewer tools. Top-mount strut spacers that require no strut disassembly skip the compressor entirely, and some kits include replacement hardware. Check whether your kit choice affects your factory coverage in our warranty guide before you order — saving $200 on tools means little if a dealer denies a related claim later.
Frequently asked questions
Can I install a lift kit with just basic hand tools?
Yes, for most 2- to 3-inch kits with a full socket set, breaker bar, jack, tall stands, a torque wrench, and a rented spring compressor if needed.
What size jack stands do I need for a lift kit install?
Tall 6-ton jack stands — strong enough and tall enough to reach the frame with the suspension drooped.
Do I need an impact wrench to install a lift kit?
Not required, but a 1/2-inch impact wrench saves hours on rusted hardware. Always finish with a torque wrench.
Can I rent a spring compressor for a lift kit install?
Yes — most auto parts stores rent them for a ~$60 refundable deposit, effectively free on return.
What is the most commonly forgotten tool for a lift kit install?
Penetrating oil applied 24 hours before the job — rusted bolts are the top reason DIY installs run long.
How much do DIY lift kit install tools cost in total?
$400–$900 buying new, or under $250 with rentals and borrowed tools — often less than one shop install.
The bottom line
When you ask what tools do you need to install a lift kit yourself, the honest answer is less about exotic equipment and more about having the right basics: full metric sockets, a real floor jack, tall 6-ton stands, and a torque wrench. Those four categories cover 90 percent of the job, and everything else — the impact wrench, the grinder, the second jack — just makes it faster and less miserable.
Spend your money where safety lives: stands, jack, torque wrench, and a quality spring compressor rental. Skimp on the consumables and the job gets slow; skimp on the safety gear and the job gets dangerous. Buy once, install confidently, and you will own the tools for every suspension job that follows.



Leave a comment